Pages

Thursday, September 5, 2013

Come Tour My Apartment

Howdy!!! Sorry I have not posted in a while but its September so that means: school starting, moving apartments, and seeing friends I haven't seen in months! These are my last few months here in Aggieland and since my parents are the best parents on the face of the earth they allowed me to get a one bedroom for this semester! I have spent the last week packing, moving, and settling into my new humble abode.  I am absolutely in love with my apartment and am sad that I have to move out in December! But with that being said y'all are here to see what I have done with the place so here it is! 

Entry way:
 I made the mirror above and the rug on the ground.  The three hooks are 3M Command hooks that are metal (oil rubbed bronze).  Tutorial for the rug will come in the next few weeks. 


 Kitchen:


 Shelves made by Dad and myself for old apartment worked great here to hold some stuff I couldn't bring myself to pack and to hold my baking dishes.

 Made the Texas string art years ago and fit just perfectly here.
 Anyone who knows me knows I love to bake.  I needed more counter space and a place to put my Baby, the kitchen aid mixer I got last year for my birthday, which by the way is less than a month away!!! This rolling cart by walmart works perfectly in this space!
Traci do you see the rooster!!!!
Entering the living room: 
These crates use to be in my bedroom in my old apartment but I had no space for them in my new bedroom and my mother came up with the brilliant idea of rearranging them and putting them along this wall.  I am not too wild about the fact that everyone sees all my paint and stuff for crafting but hey when you move from a 800+ sq foot to a 600 sq foot apartment you got to do what you got to do!
I have been wanting an old ladder to hang my blankets on like the one in this picture for a while but being a college student its hard to pay what people are asking for one of them. So when I came across this tutorial I made one the next day! I am in love with it!
 Notice the picture frame on the top? My craftiness rubbed off on my old roommate and she used a creative way to ask two of our friends and myself to be her bridesmaids! So excited for her and her fiance!
 Notice the picture frame on the top? My craftiness rubbed off on my old roommate and she used a creative way to ask myself and two of our friends to be her bridesmaids! So excited for her and her fiance

Living Room: 
 My mother is amazing she helped me hang my cross collection we were able to hang almost all of them using 3M Command products so there was not wall damage when I move out. 
 I built this ottoman and there will be a blog post over it in the next week as to why to NEVER build one!


 Yes I know the legs are not stained or painted.  I am still trying to decide what to do.  Why don't y'all help me. Here are the options: stained (dark walnut), painted (white/cream) or weathered (stained dark walnut then painted and sanded). Comment below your votes!


 Bedroom: 


Thanks for checking out my new lovely home!  

Wednesday, September 4, 2013

Salad In A Jar


Howdy y'all! Some of you who know me know I have put on a few pounds since well senior year of high school but it got worse when I went off to college.  Freshman 15? hahah yeah it exists and it can be more than fifteen pounds.  Any who...I had, had enough and decided to try and loose weight this summer.  I have tried weight watchers online before, yes it works but I need someone motivating me and checking in on me so that did not last too long.  I tried my own creation of a diet with no carbs... yeah DON'T EVER DO THAT!!! It is not healthy or smart.  So when my friend from high school created a weight loss program and was looking for people to try it out I applied!  Summer Petro is nutrition major at Auburn (SSSSSSSSS, only you aggies will get that one) and is the lovely woman who created the weight loss/ clean eating business Funeral For My Fat.  I have been attempting to follow her plan for me the best I can, it can be hard but its not impossible.  Since I started the program with Summer I have lost about twelve pounds and between last month and this month I have lost 4% body fat without doing anything but following her meal plan.  So now that I have bragged about how amazing Summer is I am going to show you an example of how I do meal prep so that I stay on track! 

Salads are a big thing at my house.  I swear there isn't a meal my mother makes that doesn't have a salad on the side.  But living alone makes it difficult to make salads like my mom does.  So when I saw salad in jar I knew it would be perfect for me! Here is how I make them.  They are inspired by Salata (my favorite place to get a salad ever!!).  

What you need: 
  • Mason Jars ( large ones with wide mouths if possible) 
  • Lettuce ( I like roman, I tried red tip but it isn't as good)
  • Salad Dressing (I love La Madeleine's fat free cesar 
  • Any veggies/fruits you like in your salad (Cucumber, avocado, black beans for this one)
  • Barilla Plus Bow Tie Pasta  (cook according to the directions and let cool) 


How to make them: 
  1. Wash your lettuce and any veggies or fruits.  I wash my lettuce by cutting it and filling up the sink with water then washing the cut lettuce in it like a bath and spinning it dry in a salad spinner.  Cut and peel any veggies or fruits that need it.  
  2. The first layer in your mason jar is your salad dressingThe suggested serving on La Madeleine's dressing is 2 tbs.  I will be honest, that is a lot! I found this out the first time I made it so any where between 1-2 tbs is what you will need. 
  3. Second layer is going to be your veggies you want to marinate in the dressing.   I put my cucumber then avocado then black beans.  You want to put your veggies in order of denseness (denser on bottom).
  4.  Third layer is your Barilla pasta (make sure its completely cool before adding it!
  5. Your last layer is going to be your lettuce.  Make sure not to fill it too much so you can shake it later on down the road.  
  6.  When time to eat just, shake and serve on a plate or eat out of the jar! 
These should last about 4-5 days in the refrigerator.
HEB sells in the lunch meat section prepackaged grilled chicken you can top your salad with. 
If you have any questions don't be afraid to ask! I will post my other favorite recipe I came up with soon.     

Thursday, August 1, 2013

How to Pick a Thrift Store Lamp

Almost every single lamp I own in my apartment has been thrifted in some form or fashion.   The one next to my bed is an old brass/brass look alike lamp I bought at SAM (Spring Assistant Ministry), which I highly suggest, and sprayed painted oil rubbed bronze with a burlap lampshade on it.  It is probably one of my favorite lamps I have ever done.  I have a wooden one I found at Goodwill and have repainted and have it on my desk and then the ones in my living room were old brass lamps my parents had in their bed room and gave to me to spray paint again oil rubbed bronze.  To be honest I am not wild about the ones in my living room but hey they were free.  This post is about how to pick a good thrift store lamp and how to redo them so they fit your style and save you money! 
 Like I said I rarely buy a lamp from an actual store unless its a good price and well worth it.  Here is how I pick my lamps when I go to a thrift store.  
 1. Do not worry about what color it is or how it looks right now! You are going to paint it and add a new lamp shade not one those old accordion style one that it most likely comes with, YUCK!!! A great example of this is this lamp right here.  It is a way outdated hunter green lamp but that does not matter! You are not buying these lamps for their color
2.  Look at the shape!!! The one above might be hideous but it has a decent shape and might look good once its painted.  I have bought several lamps in the past few years that people are like umm Maegen that is hideous and I am like oh I know that's why I love it!!! The uglier, the better it is the cheaper it is ;) Here is a great example of UGLY, UGLY lamps but ones with good shape.  
They cost me about twenty bucks together
 This is how they turned out!!! Much, MUCH better! One and a half cans of oil rubbed bronze and they are 100% better! 

3. SIZE!!! Now a days the bigger the better! The pictures above give a great example of how a big base will look really good especially when its the only thing on an end table or night stand. 

Here is a bad example for size and shape.  They will not really add anything to your home decor.  


 4. Lamp Shades! I rarely, I mean rarely buy a lamp shade at a thrift store.  I believe I have only ever bought one except for the ones the lamps might come with.  Yes you can try and recover lampshades but in my experience that is harder than people on Pinterest make it look! Mines have come apart because of the heat and well frankly a small lamp shade will run you about ten bucks and you do not have to fuss with the recovering process! Now if you want to know where I buy my lamp shades the answer would be it depends. If I want a burlap lamp shade my new favorite store is Kirklands they sell three different colors online so you have to pay for shipping unless you are lucky like I was and get free shipping.  They run about 15 bucks and are a great size! Here is a picture of one of them on my new lamp

Other stores I like for lamp shades would be Target and World Market. Depending on the one you like you are looking at around 10-30 dollars a piece.  Let's face it the most expensive part to any lamp is the lamp shade.  So shop around! Use coupons! Do your research! And if you are really brave then try and recover one.  

Now that I have given you my tips on how to pick a lamp let me give you a few tips on how to spray paint them! 
1. Be patient! Yes anyone who knows me, knows I am not patient.  I swear that's the hardest part for me when doing any project! Here is an example of me not being patient and what happens.  

 2. Buy a good spray paint! Kylon works well and so does Rustoleum.  Now I would suggest a gloss or high gloss finish for your lampsThey look better with a glossy finish and don't look like you did it your self.  
3. Use short fluid movements when you spray paint.  Be sure to not concentrate in one area too long or you will get runs like the one above.  I suggest 3-4 light coats for it to be fully coated.  
4. Once a coat dries tilt your lamp so you can get a different angle on it and cover every single spot.  Trust me NOTHING is more frustrating than thinking your finished painting your lamp, in the heat of Texas summer, to find out you missed some spots because of not getting every angle
5. If you are working with a glass or porcelain lamp base be sure to lightly sand it with sandpaper that is at least 180 or 220 grit. The finer the better you do not want to leave marks but just to scuff it up so the paint will stick.  You might also want to use a primer for the porcelain but for my glass one I did not need it. Be sure you wipe it down again before you paint it or else you will have a mess on your hands. 
6. If you want to be sure you don't get any overspray on your cords or the part where you screw the light bulb in cover it up with painters tape.
7. Do not be afraid to use color! I love colored lamps they add a pop of color to a room and if done right are a great accent piece! 

WHEEWWW That had to be the longest post I have written to date! I hope you find all these tips to be helpful and informative.  Do not be disappointed if you do not find the type of lamp you are looking for at the first thrift shop you come to, keep searching  you will find a gem eventually! Happy thrifting (Cue Thrift Shop by Macklemore, "I'm going to pop some tags I've got only twenty dollars in my pocket")


Wednesday, July 17, 2013

Bathroom Update!!

I showed you last week how to make some very cute jewelry holders with clothes pin and a piece of wood(heres where DIY Jewelry Holder), now I just wanted to show you another way to use them.  


Use them to hang belts, scarfs, tights, tank tops, and spaghetti strap tops, you name it I am sure it will work! Like I said before I plan on making some plain ones for my closet for at my apartment to hold some of the things mentioned above.  I love the fact that I could store a pair of sunglasses on top of the clothes pin and I even hang some of my rings on them as well! Here are a few more pictures so you can get a better look at it! 

  
  That earring holder should be up on my etsy page within the week I have several to sell that are blueSo if you are interested in one you can contact me but in the mean time check out my etsy page at: http://www.etsy.com/shop/powertoolsnhighheels?ref=si_shop

Happy Hump Day :) I am headed off to Austin to see my sister, a.k.a my cousin, Pegleg!! Watch out Austin trouble is coming to town! 

Monday, July 15, 2013

Cheap and Easy Magnetic Make Up Holder


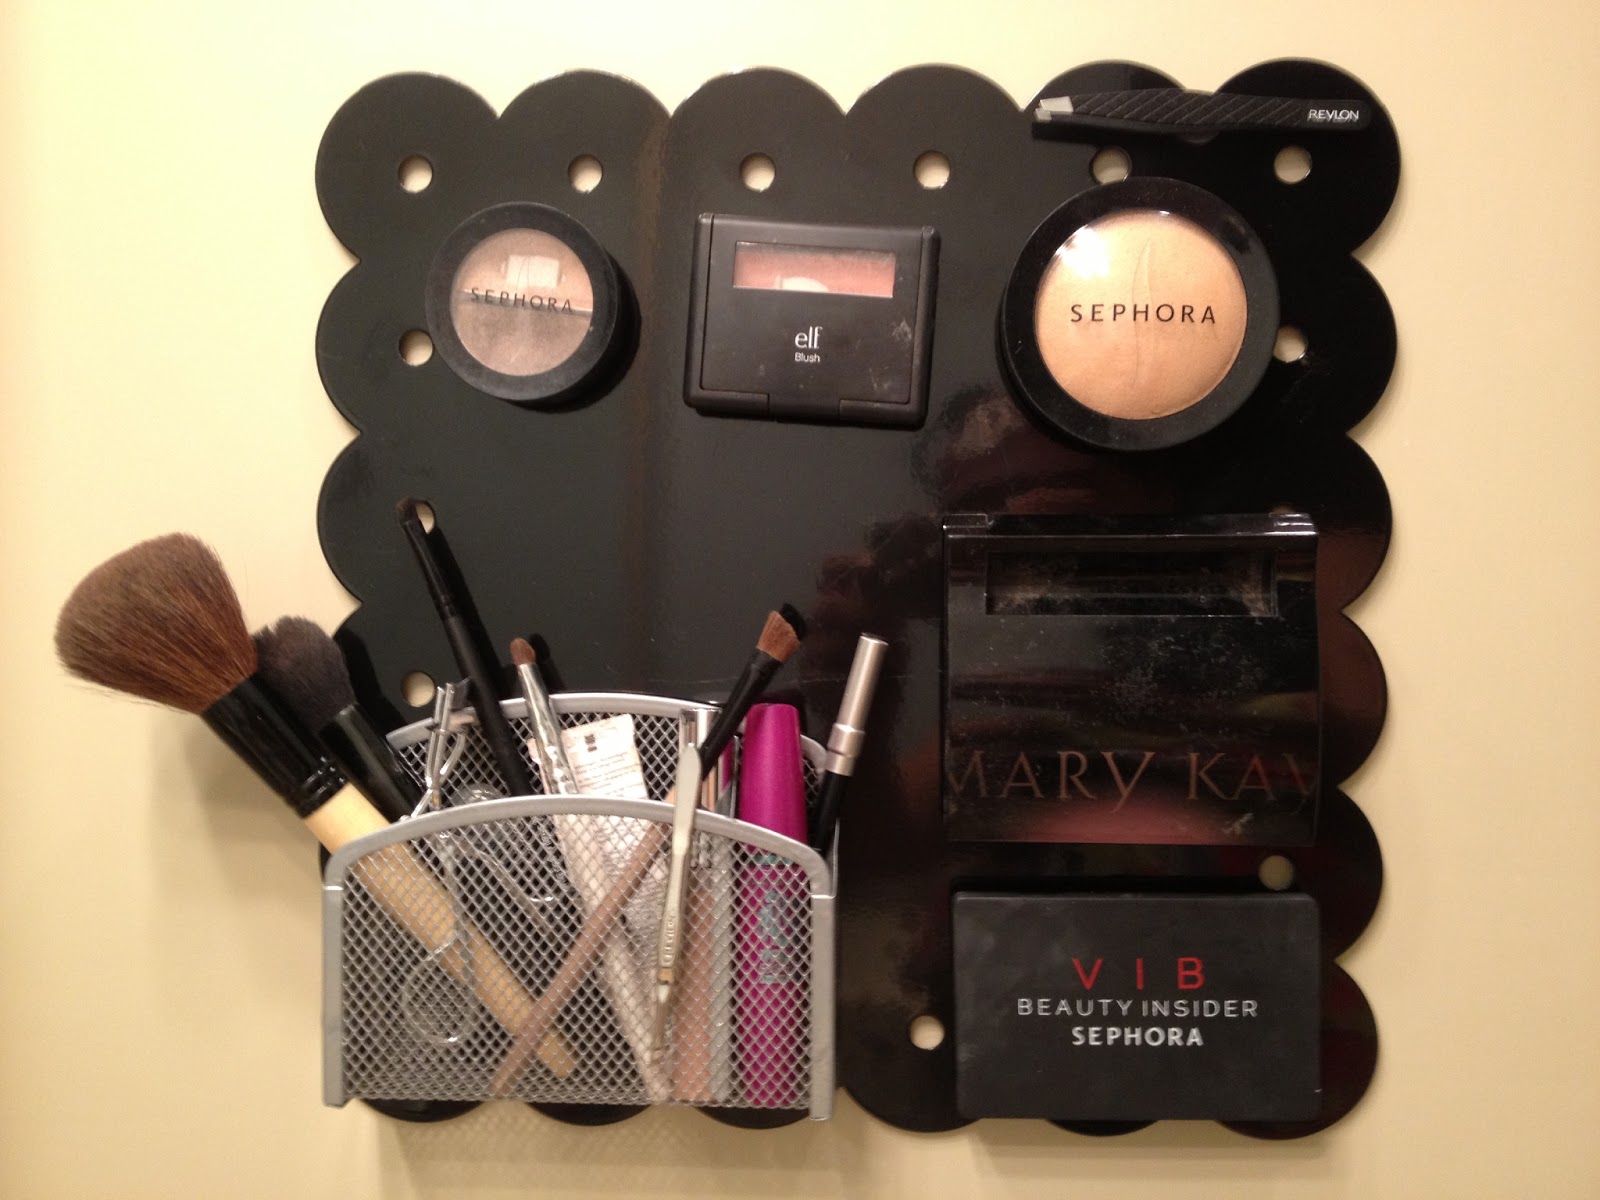
If you are like me you have seen several different forms of how to put your make up on a magnetic board on pinterest about a million times. I kept thinking what a great idea but come on I do not have that much make up and where would I put it and why would I spend that much money on something that I might not even use. Finally I had, had it and decided I would come up with a cheap way to do this and give it a shoot but was in no hurry. The other day I went into Joann's for just a cupcake box for my new business, one of my many I have/had, and of course I walked out with way more than just that ONE cupcake box. How many of you have walked into Joann's, Hobby Lobby, or Michaels and come out with just what they went in for? Not many of you I am sure. Well as I was walking around I came across my solution to my make up issue! Remember I did not want to spend that much and I did not want it to be too much work. Something I didn't mention is when I go back up to school I have a medicine cabinet, that I never use, that causes a problem for this solution so I needed a way to hang it or adhere it to it without damaging the hideous mirror medicine cabinet. The joys of renting, right?!?!?! So as I was saying I came across this metal plates that come in several different colors and here in Texas cost $9.99I thought hmmm this could work so I whipped out my 40 % off coupon, btw Joann's is my absolute favorite place to shop because they have the best prices and the BEST coupon policies, and bought it. After my coupon this magnetic plate was only $5.99 I also picked up some 3M Velcro picture hanging strips and a pack of round magnets. I have to say I am pretty impressed with myself because it only cost me about ten bucks! So here is the DIY and final product of the project.

Items Needed: 

  • Metal plate in any color from Joann's Fabric (it is used for organization) $5.99 after coupon
  • A package of magnets (however many you need) 
  • Glue gun 
  • Glue for glue gun 
  • 3M hanging strips   

    Optional: 

    Wire metal magnetic basket for tubed make up, brushes, and tools

 How To: 

1. Take your make up and attach a magnet or two depending upon size using your glue gun.  Best part of this is once you have used up your make up you can just peel it off and reattach it to your new one.  


 Yes I do not have much make up :( I don't really do much with my make up on a daily basis and even when I go out I only spend and extra like five minutes. 


2. Take your 3M hanging strips and place them on the back of the metal plate.  


3. Hang your metal plate up 


4. Place your make up on the metal plate and admire your handy work.   


 Use a magnetic basket to hold all your tools and things you don't want to add magnets too!

You can use a small magnet to hold your tweezers because the magnet attaches to the plate and then will hold your metal tweezers in place!

So as I promised a CHEAP and EASY magnetic make up holder.   Hope you love yours as much I love mine.  Please feel free to pin to pinterest and don't forget to favorite my blog to stay up to date on all my projects :) 

Tuesday, July 2, 2013

DIY Jewelry Holder


This is an easy and simple DIY project that makes organizing your jewelry easy and fun to look at! All you need to do is run out to your local Hobby Lobby or craft store and you can get all you need right there.  


Items needed: 


1 - board from the craft wood section the one I used was roughly 6"X36" (I had my dad cut mine down once I got home but I wish I had left it its original length) 

1- one package of wood clothes pin 

Glue Gun 

Glue for Glue Gun 

optional: 

Paint 

Stain 


How To: 


1. The first step is optional which is to paint or stain the board and the clothes pins you are going to use.  I pulled apart my clothes pins to stain them....BAD BAD IDEA!!! I nearly broke every single one of my nails trying to put them back together.  So I suggest that you keep them together and just stain or paint them like that.  Trust me it will be worth it in the long run. 


2. Now if you chose not to paint or stain your boards or clothes pins you can join in on this lovely DIY right now.  This step is so complicated you just won't be able to do it...ok I kid its so easy that even the kids I babysit could probably do it if I wasn't a perfectionist and it wasn't a glue gun we are using.  Take your glue gun and run a bead of glue down one part of the clothes pin then glue it to the board.  Be careful not to use too much or it will show once you place it on the board.  Repeat this step till all the desired clothes pin are attached to the board. 


3. Once you have have allowed them to dry ohhhh about 2 minutes you can then decide how you want to put it up on the wall.  I am a HUGE fan of 3m command strips and hooks.  I have used MANY, MANY of their products over the years because I am a renter and they are simple and easy to use and really do work! I used three 3M Command Velcro Strips to attach to my wall and waited the time they suggest before hanging up it up and hanging my jewelry up as well.  


4. Admire your handy work and send the pictures to all your friends...oh wait that's me hahaha 


Now my mom loved mine so much I have to make her one but she isn't going to use it for jewelry but to hang her scarves, leggins, and cami's instead.  I am going to make myself a few more as well for the same things at my apartment. 


So just in case you didn't get to see it enough the first time here it is again :) 


So there you go, simple and easy.

Thursday, March 28, 2013

Dollar StoreBoot Forms


Do you have boots that look like this? 


Here's your solution!!!


I have seen several different types of boot forms to make your boots stand up and keep shape for a while now and have been wanting to make some but wants sure which type so I hadn't.  But today while I was out looking for something else for a different project, which failed miserably, I decided I was going to finally make them before I put my boots up for the year.  This is a very simple and CHEAP tutorial on how to make what I did.  All of the items can be found at the dollar store, my dollar store of choice is Dollar Tree.  

Items you will need: 

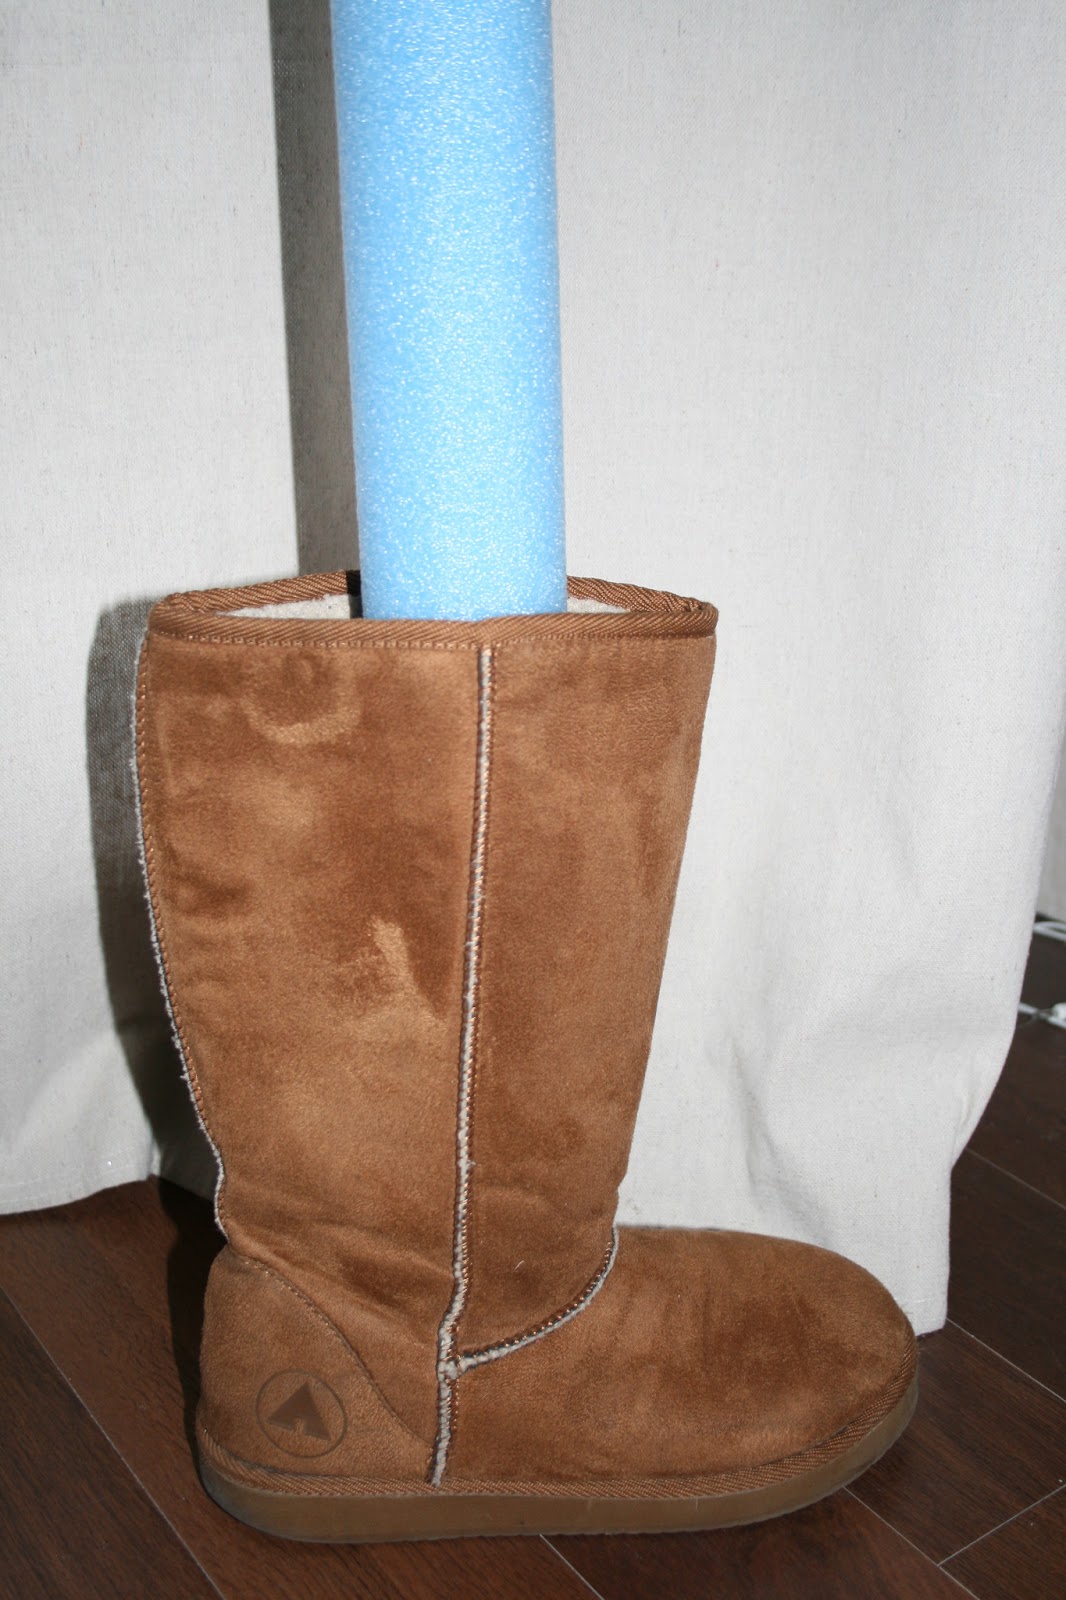
  • A pool noodle (You can usually get about two pairs of boots out of one noodle give or take) 
  • A pair of tall socks or knee highs (Optional)
  • A bread knife 

Step 1: 

Stick the pool noodle in the boot and measure how tall you want it to be I liked my sticking just a little out but they do not have to.  


 Step Two: 

Cut the pool noodle using the bread knife. 


Step Three: 

You can stop here if you want and just leave it as is or, if you want to be fun like me, you can jazz them up a little.  To give them some color and make them fun take the sock and put it on the noodle. 


Once the sock is on and pulled tight you can tuck the remaining sock into the little hole at the end of the noodle, like so. That's the best part of this DIY, NO SEWING OR GLUING!!


Don't you just love my nail color...testing out golds to find the right one for my Aggie ring day coming up soon.  It's a BIG deal to get your ring here at Texas A&M. 

Step Four: 

Stick your new boot form into your boot and admire your handy work.  See it wasn't that hard now was it? 


I did all five pairs of my boots for less than 10 dollars and I couldn't be any happier with my results.  You could jazz them up even more if you wanted by adding a yarn pom poms or some ribbon but I was happy with just this and I am swamped with school work for classes so I decided not to do anything else.  If you add something else to it I would love to hear about it. Hope you enjoyed today's cheap and simple DIY. Now off to sleep for this tired college student!